
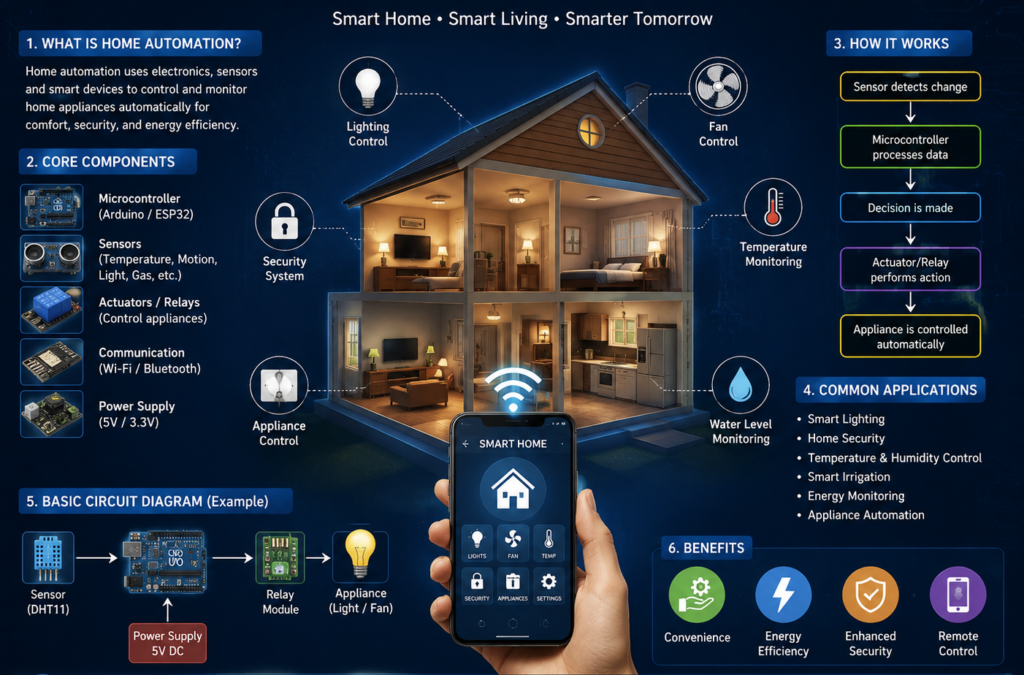
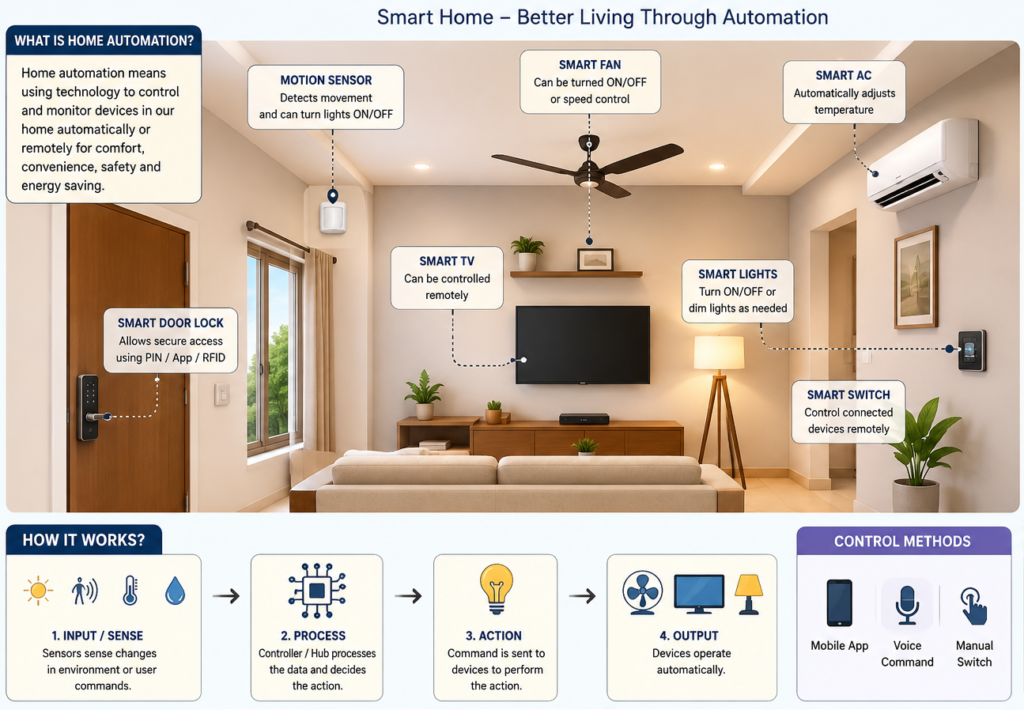
Imagine a home where the lights welcome you when you enter, a fan adjusts itself when the room gets warm, plants receive water only when the soil is dry, and a security light switches on when movement is detected. This is not science fiction—it is home automation, and at its heart lies a simple combination of electronics, sensors, controllers, and actuators.
Before building a smart home, however, it is important to understand the electronic foundations that make automation possible. The essential electronic components used in home automation circuits are –
1. Processing & Prototyping Core
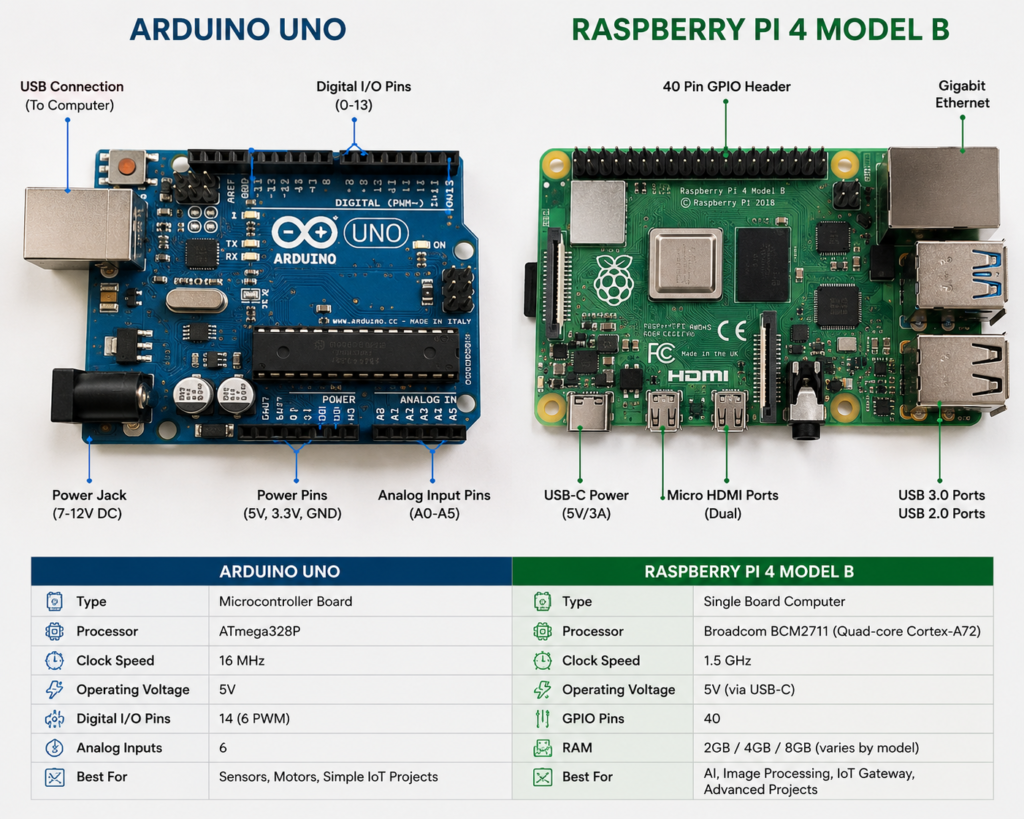
- Microcontroller (e.g., Arduino Uno, Raspberry Pi): The “brain” of the automated system that executes code scripts to process sensor data and command output devices.
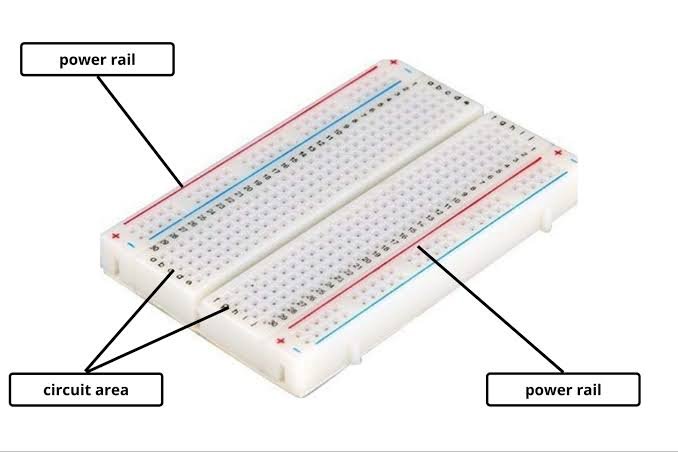
- Breadboard: A board with internal metal strips that allows components to be plugged in and connected without soldering, making it ideal for temporary circuit prototyping and testing.
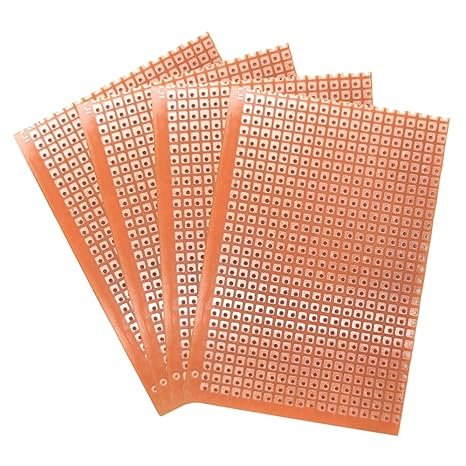
- Printed Circuit Board (PCB): A permanent board made of insulating material with thin copper tracks used to solder and secure final circuit designs.
2. System Inputs (Sensors)
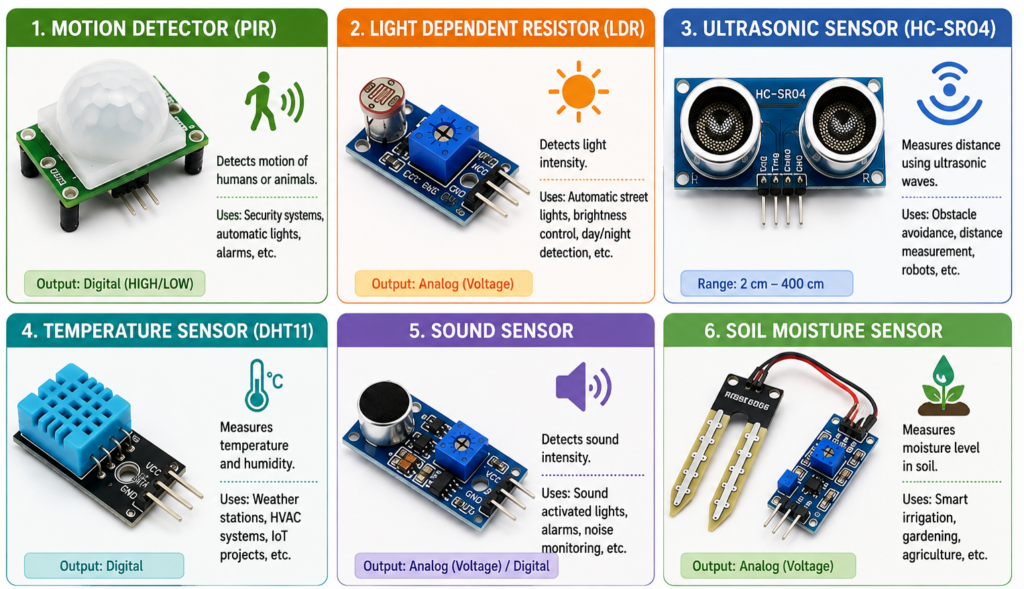
- Motion Detector (PIR): Measures changes in infrared heat radiation emitted by humans or animals to detect movement.
- Light Dependent Resistor (LDR): A light sensor whose electrical resistance changes depending on ambient light levels.
- Ultrasonic Sensor (HC-SR04): Emits and receives sound waves to measure the distance to an approaching object.
- Temperature Sensor (DHT11): Measures surrounding air or surface temperature in degrees Celsius.
- Sound Sensor: Converts acoustic ambient sound vibrations into electrical signals.
- Soil Moisture Sensor: Measures the volumetric water content in soil to determine irrigation needs.
📖 Read Also: Bio-Inspiration: Nature’s Original Smart Systems
3. System Outputs & Actuators
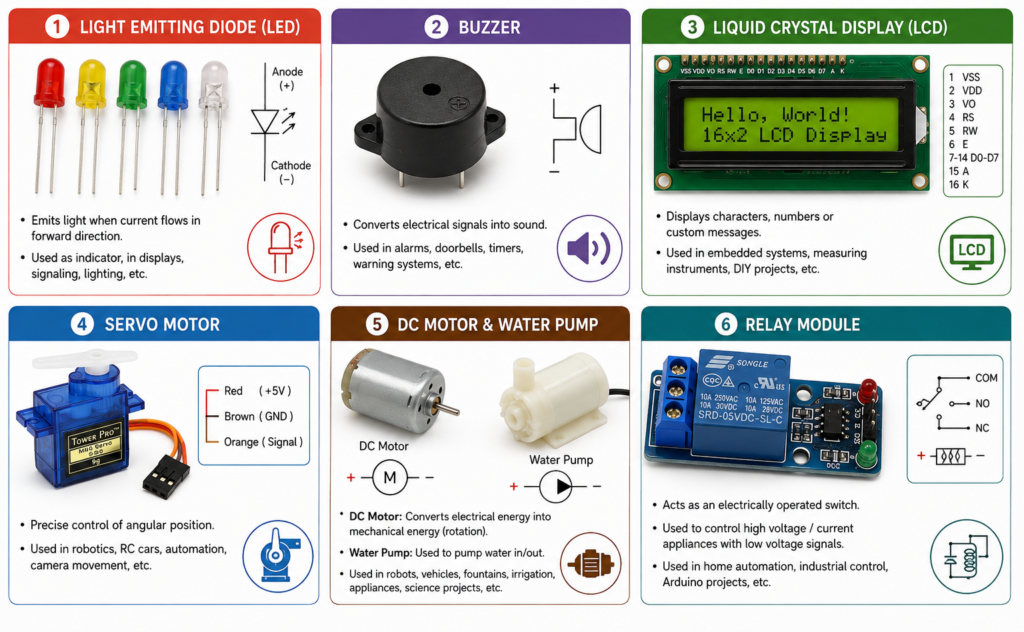
- Light Emitting Diode (LED): A semiconductor light source with two legs—a longer positive leg (Anode) and a shorter negative leg (Cathode).
- Buzzer: An audio component that produces an alert sound or tone when energized.
- Liquid Crystal Display (LCD): A 16×2 character display screen used to show sensor readings or status messages (paired with a potentiometer for contrast adjustment).
- Servo Motor: A motor used for precise angular rotation (e.g., lifting a lid or opening a gate).
- DC Motor & Water Pump: Converts electrical energy into continuous rotation or fluid pumping.
- Relay Module: An electrically operated switch that allows low-voltage microcontroller signals to safely control high-voltage appliances.
4. Power & Infrastructure
- 9V DC Battery & Power Adapters: Portable Direct Current (DC) sources and regulated wall adapters (9V/12V DC) that safely power sensitive electronics.
- Jumper Wires: Insulated wire leads used to route electrical signals between components on a breadboard.
5. Circuit Protection & Control
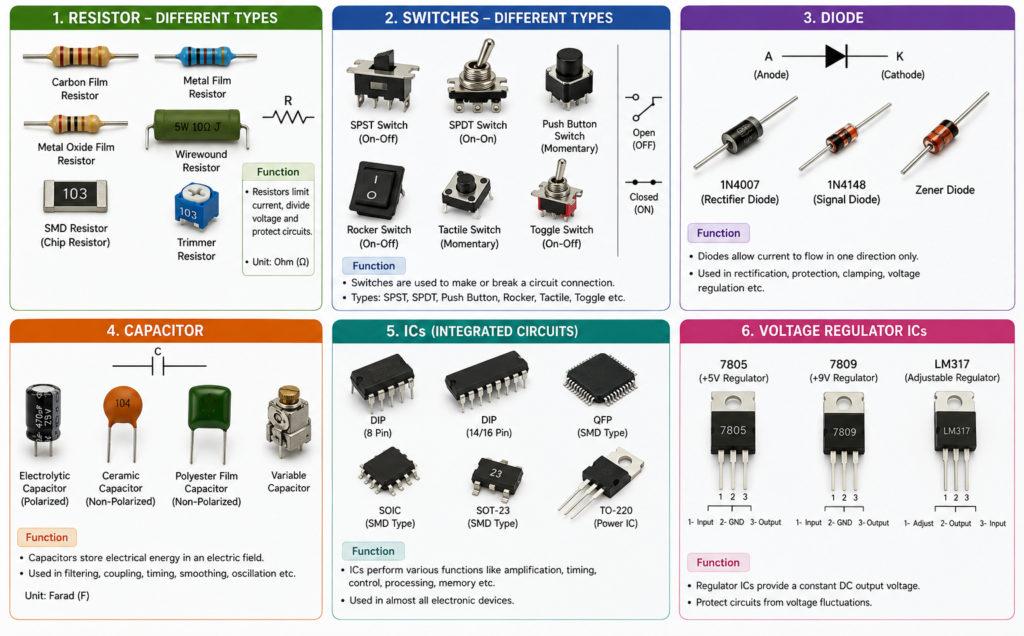
- Resistor: Limits electrical current flow to protect delicate parts (like LEDs) from receiving excess current and burning out.
- Switch: Controls circuit continuity by opening or closing the electrical path manually.
- Diode: Ensures electric current flows in only one direction.
- Capacitor: Temporarily stores and releases electrical energy within a circuit.
- Integrated Circuit (IC): An IC can perform a specific electronic task, making a project smaller, simpler and more reliable. Some examples are DIP, L293D, ULN2003, LM358 etc.
- Voltage Regulator: It helps maintain a suitable, steady DC voltage even when the input voltage changes within its allowed range. Common Voltage Regulator ICs are 7805, 7809, 7812, LM317 etc.
6. Measurement and debugging
Digital Multimeter (DMM): A measuring tool used by builders to check voltage, current, resistance, and wire continuity when debugging.
When a project does not work, guessing is rarely the best approach to ask-
Is power reaching the circuit?
Is the sensor connected correctly?
Is the wire continuous?
Is the voltage appropriate?
The multimeter helps turn troubleshooting into a logical investigation.
7. The Bigger Idea: Learn to Think Like an Engineer
The most important lesson in home automation is not memorizing the names of electronic components.
It is learning to ask:
What problem am I trying to solve?
Then break the problem into smaller parts:
What should the system sense?
How should it make a decision?
What action should it perform?
How will the user know what is happening?
This way of thinking turns a collection of electronic components into an engineering solution.
8. Conclusion
The foundation of home automation begins with surprisingly simple ideas: sensors detect, controllers decide, and actuators respond. The journey to a smart home does not begin with an expensive gadget.
It begins with understanding one sensor, one circuit, and one idea at a time.
Pingback: Tiny Board, Big Ideas: Discover the Arduino Nano